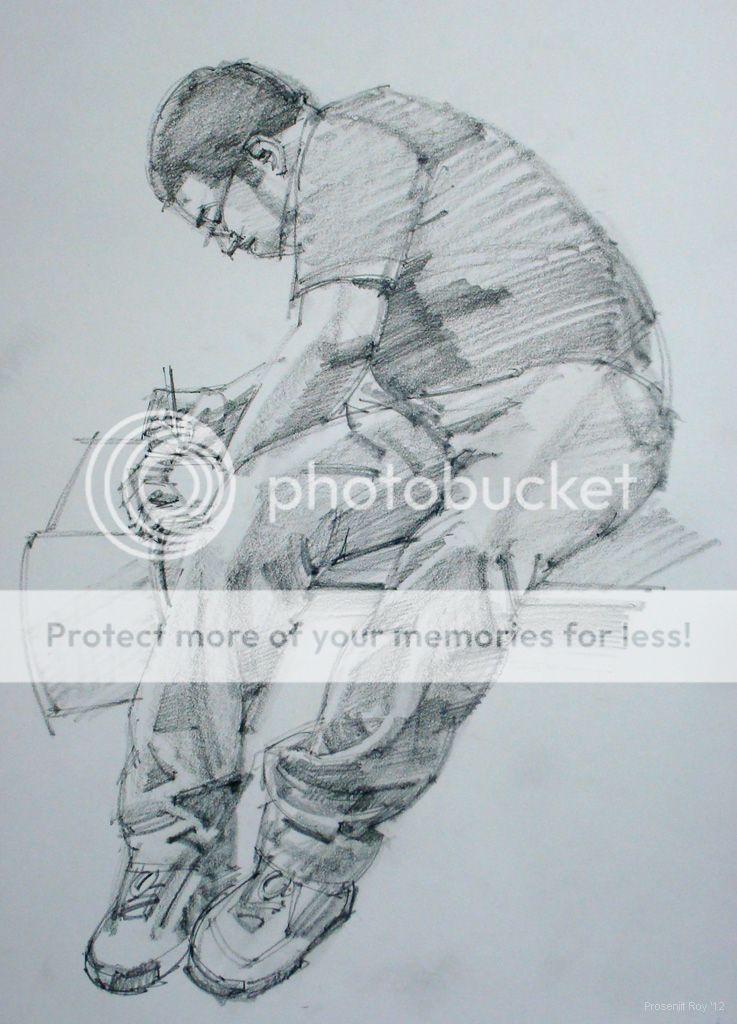
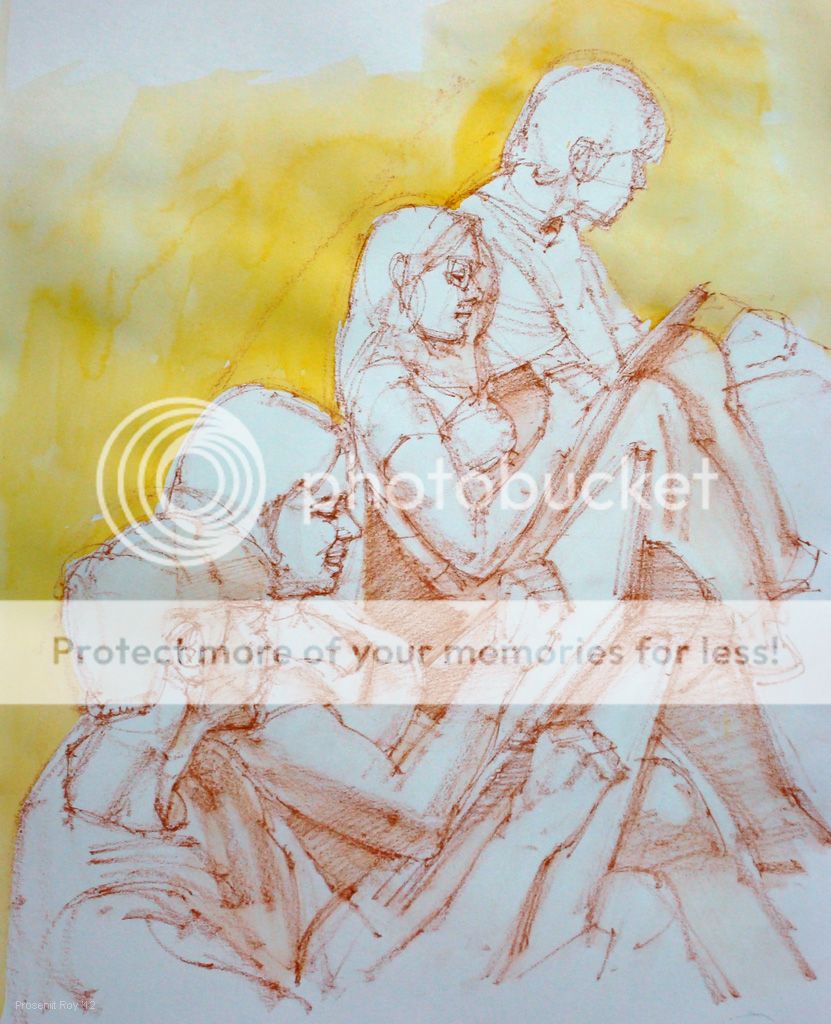
Well, that's what I was doing when I sketched this rhinoceros from a ref. I was trying out human figure drawing techniques on an alternative form. Then someone asked me, what do you mean by that?... which unleashed this babblestorm of a comparison :P Hope you find it helpful...
 |
| A3, conte, watercolor for background. Many thanks to the ref photog, who is unknown. Please view at FULL size. |
- Human - I start by marking off the top and bottom extents (for a standing figure) on the page
- Rhino - I marked off its lateral extents on the page.
- Human - I roughly mark the mid-point, which is usually at the pubis
- Rhino - here, I used the hump as mid-point, with the two 'halves'
going off in two directions - 1) along the back, horizontally, and 2)
obliquely down the neck towards the horn. I found these two 'limbs' of the (downward facing) angle at the hump to be approx. equidistant. Thus I have a basic measure of the shape.
- Human - I use the vertical head height as a unit of measurement
- Rhino - I found that, from the tip of mouth up to the neck-head junction,
the antero-posterior length of the head roughly equals 2.5 times the
total length upto the hump. I'm doing all this quickly, partly by eye
estimation, partly by extending my hand (holding the pencil upright for
measuring) at the ref.
- Human - Using the head height as rough guide for proportions, I mark
the different levels at which other parts lie e.g. shoulder width,
nipples, navel, hip width, pubis/genitalia, knee, ankle, elbow, wrist
etc.
- Rhino - I did the same with the rhino, marking off widths and
lengths of different body parts e.g legs, antero-posterior length of
belly, thickness of neck etc.
- Human - I try to find continuity of the curved outlines through the
substance of the body, e.g. I do not look at the curvature of the hip
outline in isolation, but how that 'inward' curve, if extended 'into'
the body will progress, and 'emerge' on the opposite side... this helps
me to further locate body parts in correct spatial relationship
- Rhino - I did the same here, extending e.g. the front and back
outlines of the legs, following their natural curvature, into the 'body'
of the rhino... looking to see where they emerge. I did that with as
many curved outlines (e.g. the belly, the rump area, the bottom surface
of head etc.) as was convenient to build a harmonious outline shape of
the entire 'figure'.
- Human - at this point, I'm also extra aware of the stance/pose,
balance/weight distribution.. is the figure tending to fall off or is it
solidly grounded, is there a sense of weight to it?
- Rhino - I did the same here, esp relevant for a large and massively
heavy creature such as this. Its mass and weight distribution, to my
mind, seem to dominate most other considerations of drawing!
- Human - Now that the shape is in place, I add volume to it
by noticing the direction of light, and adding the turning points or
'terminator zones' where a surface is curving away from the dominant
light source.
- Rhino - the light was coming from top right, and its a bright
sunlight so the shadows were crisp... I could conveniently mark off the form shadows (shadow on the form itself as it turns away from light) and the cast shadows (shadows of the form cast on an adjacent surface or form).
- Human - Now I look to build the 'middle-tone'.. that is the changing values in the light areas as it moves from the edge of the shadows towards the point of greatest illumination(the
highlight). If its a well-oiled body-builder with bulging muscles, this
becomes fairly easy... you know how and where to 'taper off' your
tonality as you approach the highlight area. Under a diffuse lighting,
and with less well defined musculature you have to observe carefully to
interpret the subtle changes of tonality, and thereby bring out the
underlying form. Overall, light will tend to decay down the standing
body (for a top light), with the legs being less illuminated than the
chest area.
- Rhino - he wasn't an well-oiled muscleman, but Boy... did he have
sturdy forms! So it was fun to interpret these undulations, or
sub-forms, while keeping an eye towards the over-all form of the animal
relative to the illumination. As you can see light was decaying from the
rump area towards the horn area.
Well... its easy to break it all down to theory, but while drawing
(which took about 40 mins) I was doing these instinctively, and one step
was really merging into the other, so that I didn't really have a
conscious recollection of doing it in steps. But having developed and
followed a method over a period of time, you tend to use that in
whatever you're drawing - be it a human, a horse, a rhino, or whatever.
The only thing that's different between drawing a pile of rocks and a
human is that, while the light/shadow principles are the same - you
have considerable freedom as regards interpreting the overall
shape/form, with the latter (i.e. human, rhino etc.) you have to be
mindful of specific shapes, proportions and forms. But the techniques...
of 'seeing', are basically the same.